There are many options to host a personal or small business website today and it typically costs $5 and upwards per month. This is the best option in most cases, especially if the $5 includes security patches, regular upgrades, and so on. However, if you rent a Virtual Machine (VM) on the cloud (think DigitalOcean droplets, AWS EC2, etc), this might be for you. Most VM offerings on the cloud do not include patches and updates in their all-inclusive price, so the per-hour rate is essentially just paying for using their hardware and any energy costs. This post explores if its more cost-effective to simply host your website at home.
Let’s take a typical example.
A 1vCPU/2GiB a1.medium AWS instance costs $0.0255/hr or $18.36/month approximately. A complete desktop (desktop + internet modem, etc) consumes about 1800kWh per year or ~150kWh per month. My local residential rate is $0.0950/kWh, which equals $14.25/month. A typical desktop today contains at least 2 cores and 2GiB of memory, so even at a small scale, on-premise hosting is cheaper than hosting on the cloud. This post is about how I went from hosting at DigitalOcean to hosting on-premise, bringing down my cost from $5 to less than $3.42 and increasing my hardware from 1vCPU/2GiB to 4vCPU/4GiB.
Background
I already host a number of intranet portals like a git repo, a tool to track our family finances, etc. And I use a low-power Intel Denverton-based server consuming about 25W of power to run all my VMs. This server (and all VMs) sit in its own VLAN and is accessible from a handful of other VLANs, rules coded as firewall rules in pfSense.
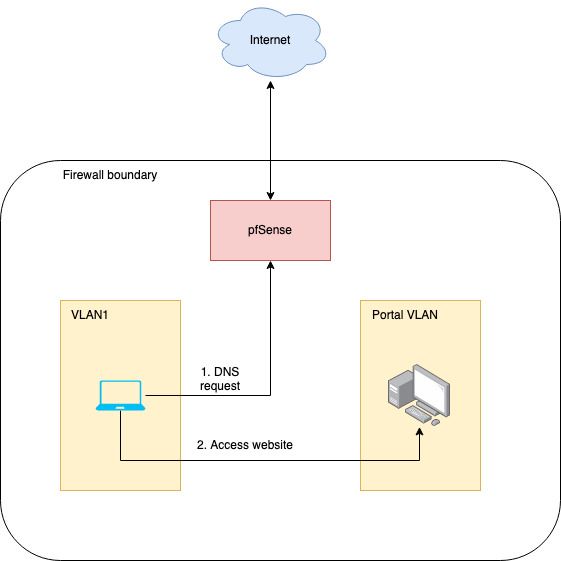
Conceptual model of hosting my blog
Using a reverse proxy is probably the best option for use cases like these because
- It keeps the option of hosting multiple websites with multiple domains open. An alternative would be to port forward to the web server but then we could host only one website or two at most – one using port 80 and a second using port 443, not an ideal scenario.
- We can model more complicated scenarios like load balancing with reverse proxies if required.
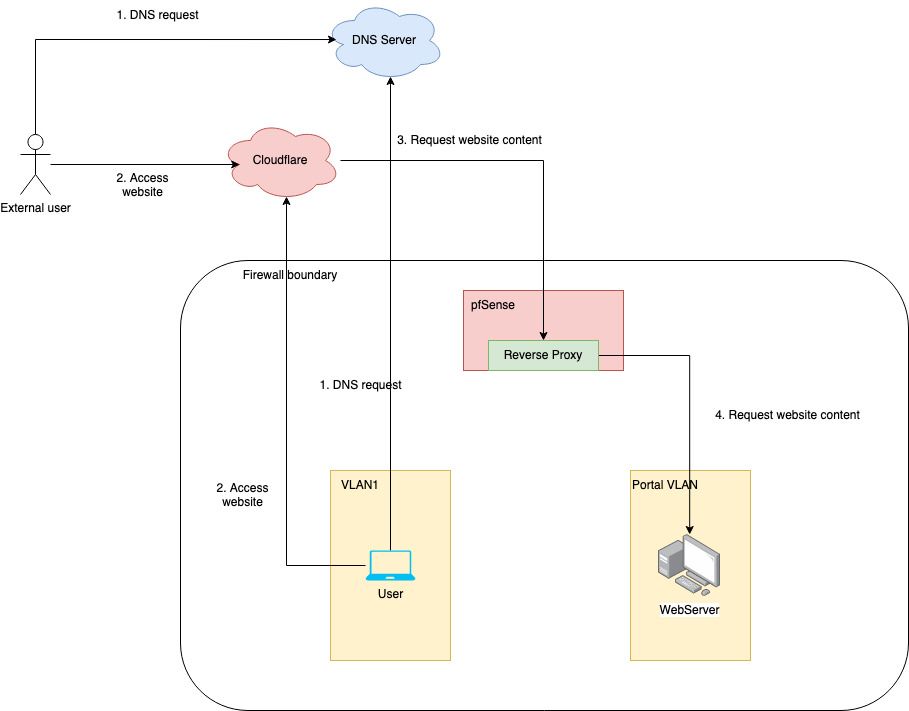
Legend
- Actors – User (computer accessing the website from within the network) and External user (computer accessing the website from outside the network).
- DNS Server – Any server translating domain names to IP addresses.
- Cloudflare – Cloudflare IP fronting the website, proxies to WebServer, and caches static content.
- pfSense Reverse Proxy – Based on the domain proxies request to the relevant server.
- WebServer – The server serving the content of the website.
Implementation
I will skip the Ghost specific details, those are well publicized and may not apply to non-Ghost blogs. I will focus more on how I setup the whole pipeline instead.
Setting up A records
Like any other website, we need to set up an A record to point the domain to our public IP. Fortunately, my ISP packages one static IP with my Internet service but other providers may charge extra for it. It’s also possible to use dynamic IPs with DDNS and CNAME records but it might be slightly more involved.
There is no difference in the process of setting up A records. I use CloudFlare so mine looks something like the one below. Other providers would have similar UX.

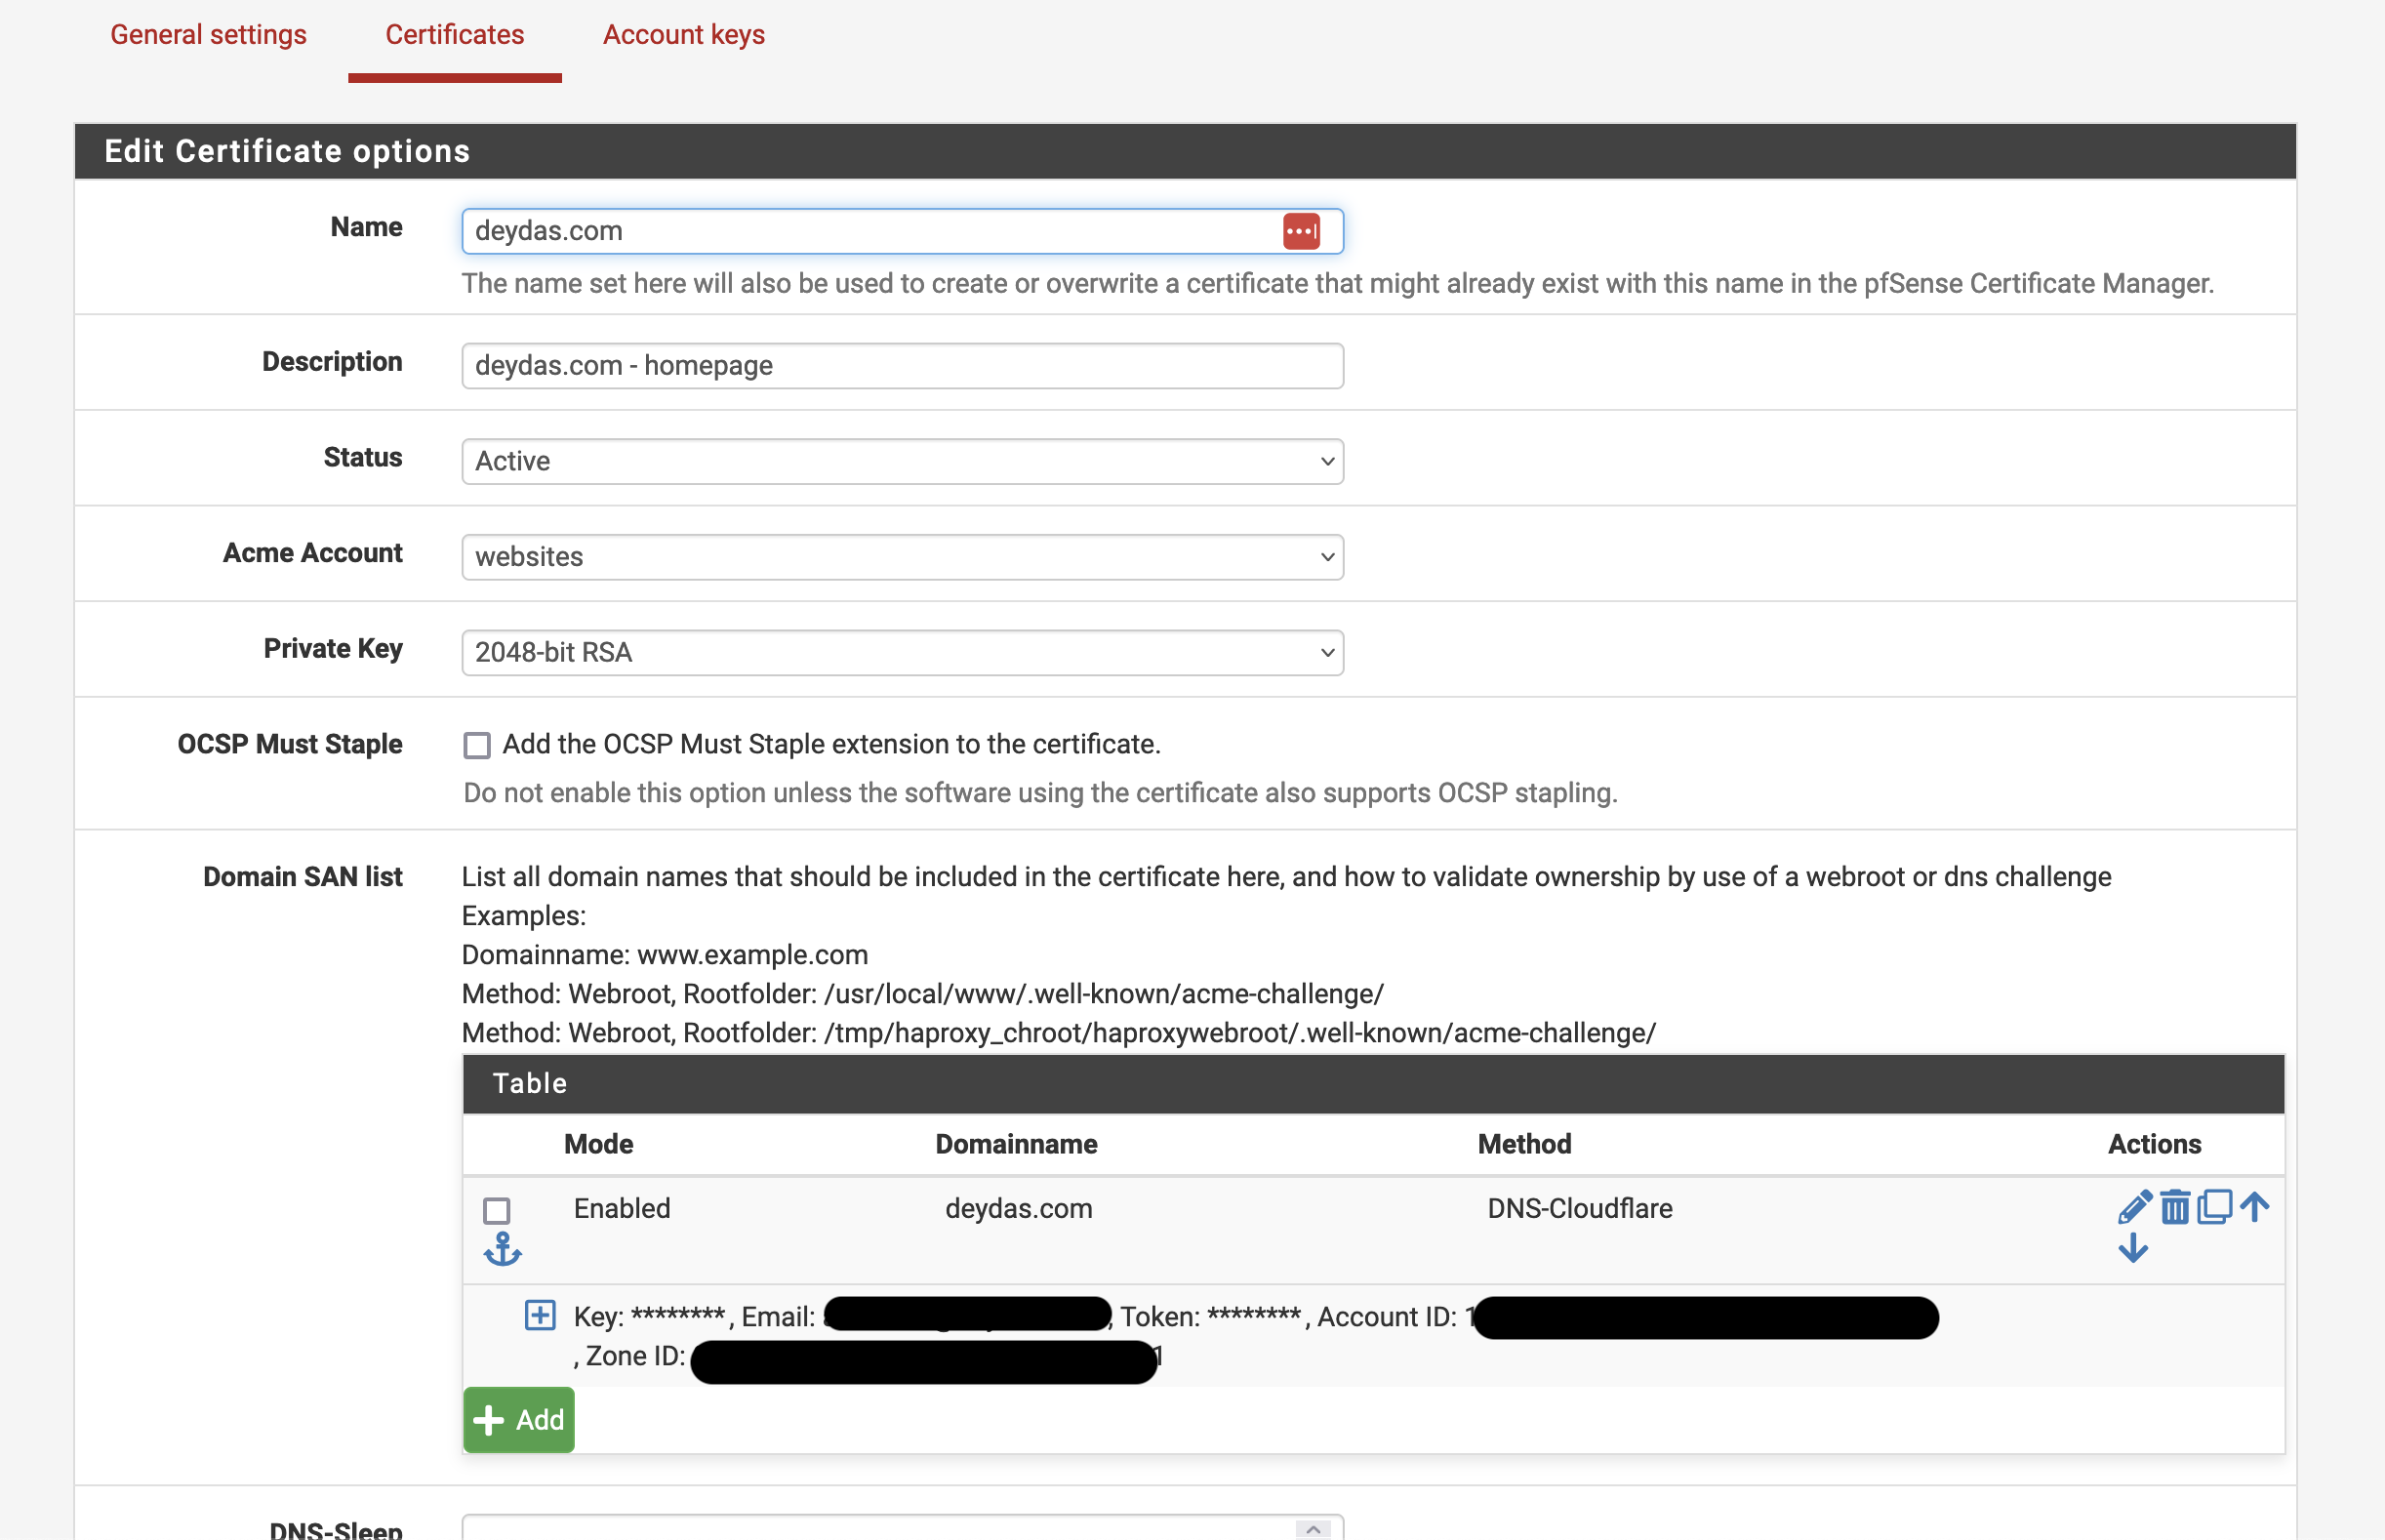
SSL certificate
The first step was to get an SSL certificate for my domain deydas.com. Although Cloudfront would be the first point of contact for a user, the tunnel between Cloudfront and the Reverse Proxy also should be encrypted. The best way in pfSense is to get a LetsEncrypt certificate with Acme. All we need to do is install the Acme package (if not already installed), add a new certificate, and make sure it is generated successfully.
Setting up the web server
Because the webserver is behind a reverse proxy, it can be agnostic of how requests are proxied. All it needs to do is listen on either 80 (http), 443 (https), or both. I chose to use 443 with a self-signed certificate because:
- Its hard to auto-renew a LetsEncrypt certificate from a web server with no direct access to the internet, although there could be other ways like DNS validation.
- We have already generated a certificate for the domain with ACME.
- The goal is to encrypt communication between the reverse proxy and the web server, which a self-signed certificate would do. The next section will explore how to suppress warnings originating from self-signed certificates.
One caveat of hosting Ghost this way is invalid redirects. The Nginx (or Apache) may require the following header to redirect properly:
proxy_set_header X-Forwarded-Proto https;
Setting up the reverse proxy
This blog post’s most important section is setting up the reverse proxy. In pfSense, HAProxy is feature-rich enough to support this and several other, more complicated use-cases. There are other options as well, like Squid reverse proxy but we will not go into details about those.
Conceptually HAProxy keeps a map between a frontend and a backend with a one-to-many relationship. The frontend listens to an address, for instance, the WAN address, and the backend tracks the webservers in this case. Let’s start with an example and see how the mapping works.
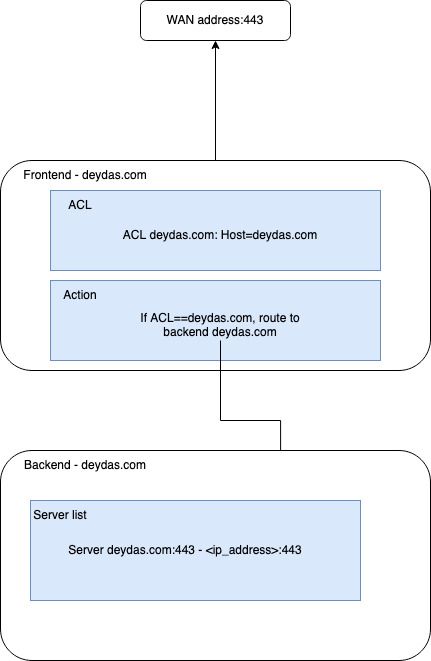
Within HAProxy, there are two tabs by those names – Frontend and Backend. Let’s start with Backend and set that up first.
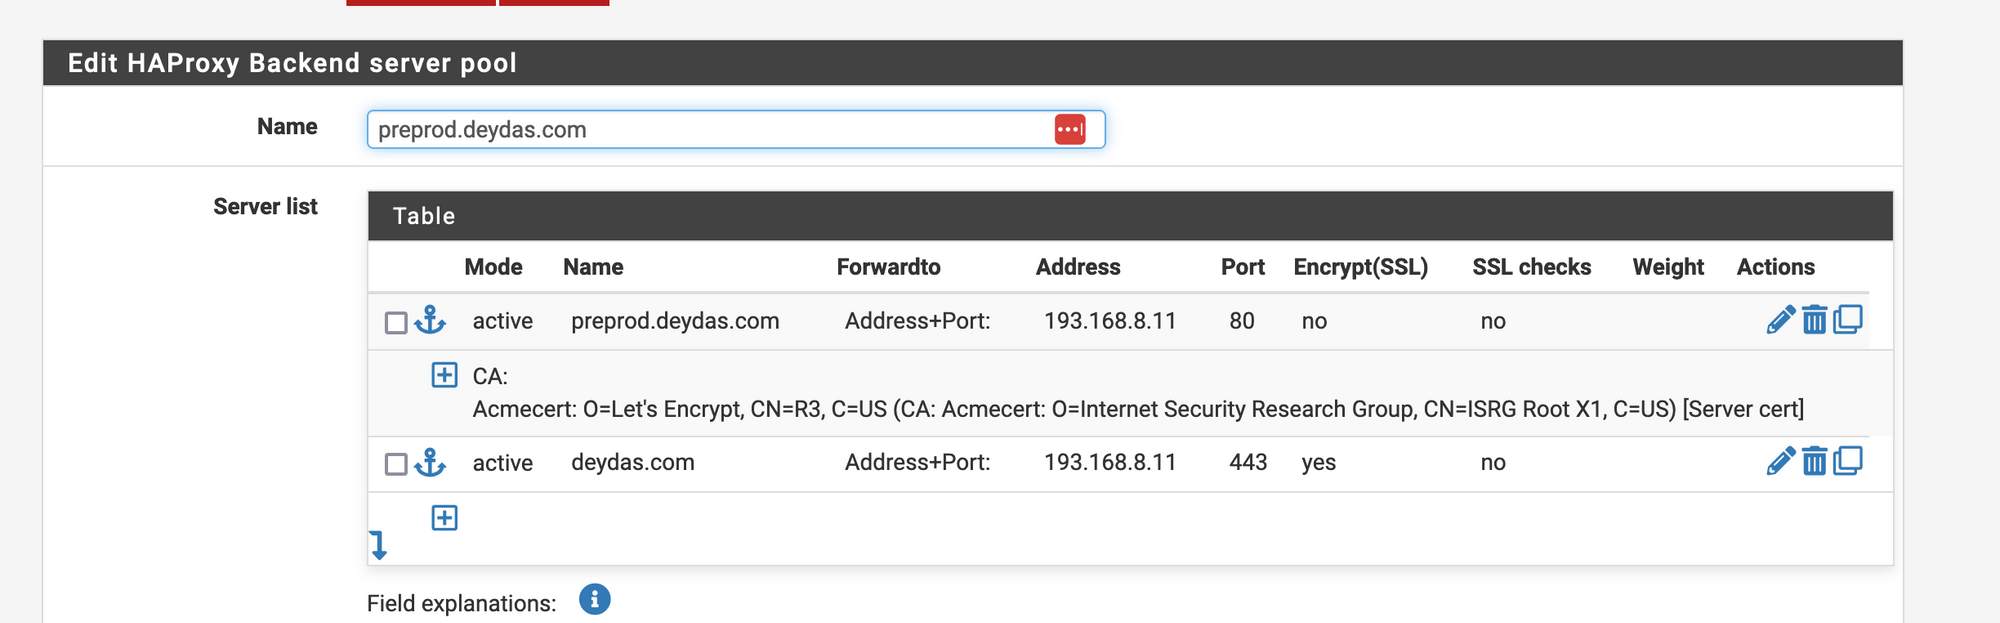
Here we have two entries with different hostnames and ports but pointing to the same WebServer. You won’t need two, just one is enough. Most fields are self-explanatory except
- Encrypt (SSL) – this option would encrypt the connection between HAProxy and the Webserver. Useful if the Webserver is running on 443 and expects an encrypted connection.
- SSL checks – Checks if the SSL certificate on the Webserver is valid. Since we are using a self-signed certificate, this check will fail, and is hence, turned off.
- Weight – Relevant if used for Load balancing.
And that’s it for the backend. Now lets move onto the frontend.
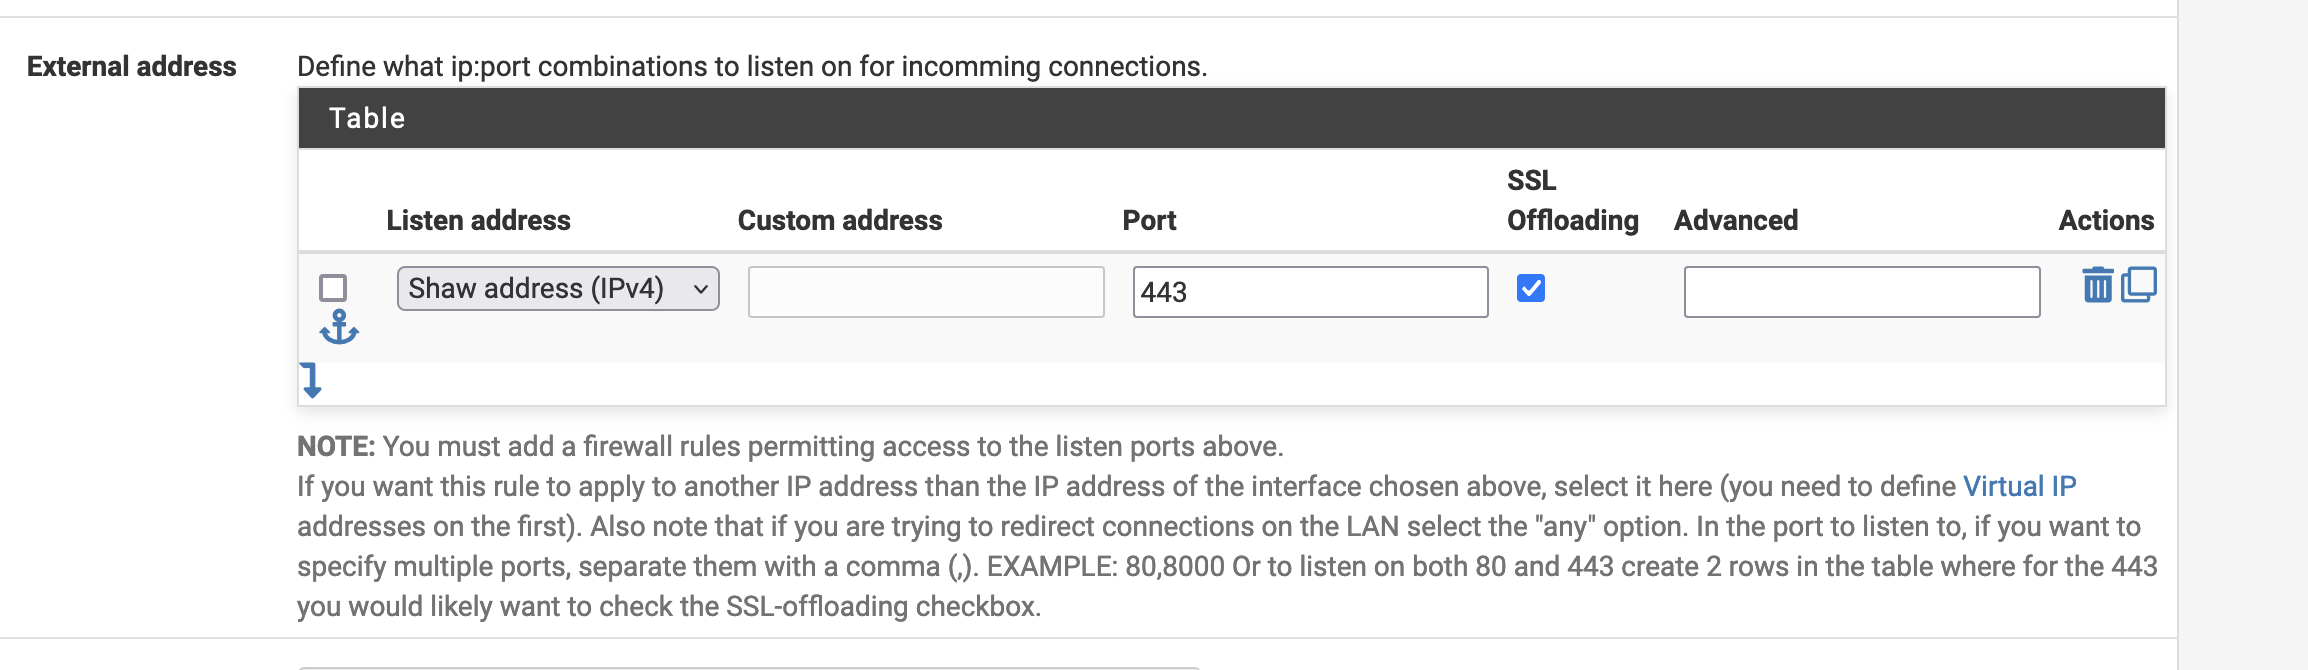
The first place is the External address. We are listening to the WAN address (Shaw = WAN in my case) on port 443. Next, since we are expecting a SSL connection, we will offload the SSL connection at the reverse proxy and use the self-signed certificate henceforth.
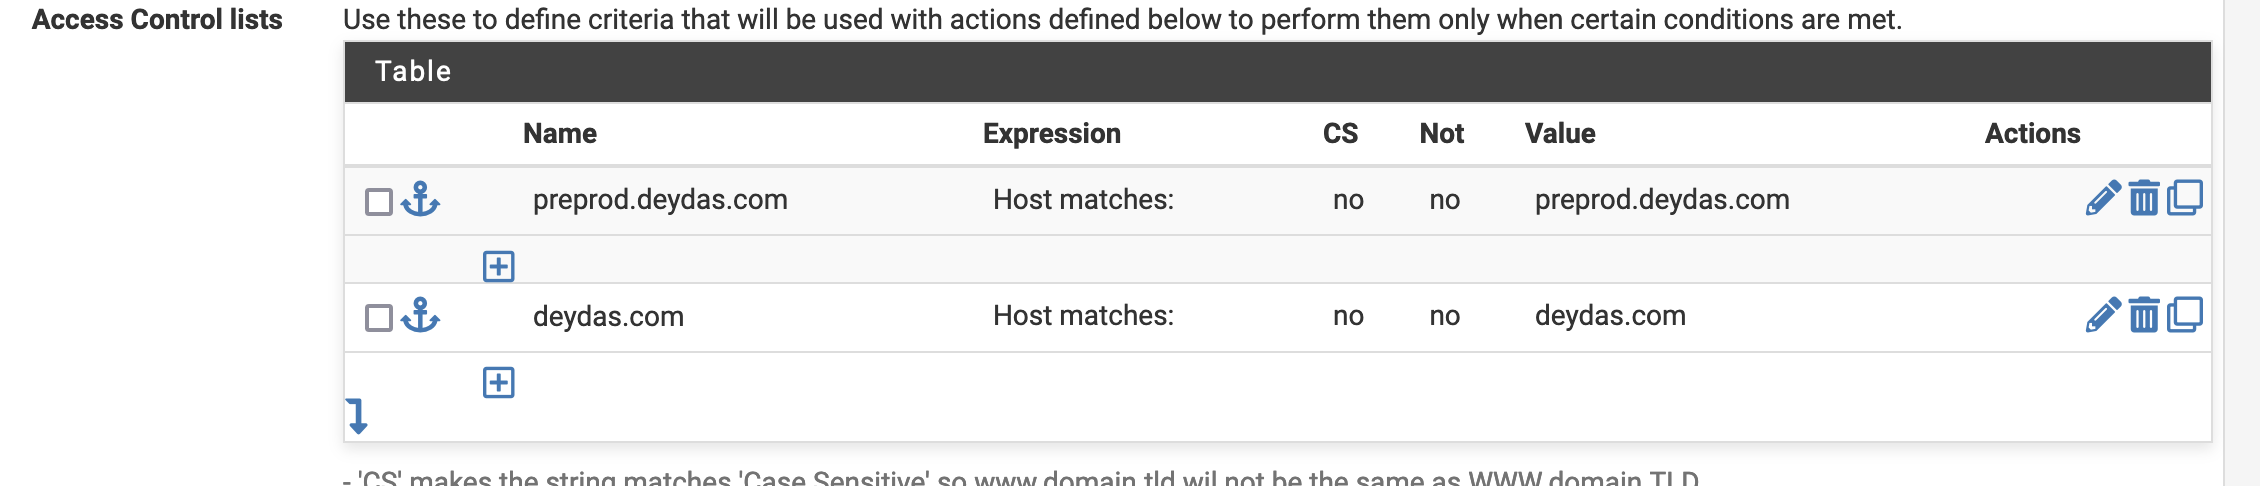
Next, we need to setup the ACL’s. We use the ‘Host matches’ rule, where if the host matches deydas.com, we call it deydas.com.

And based on the ACL name, we will choose a backend (the ones we had described earlier).
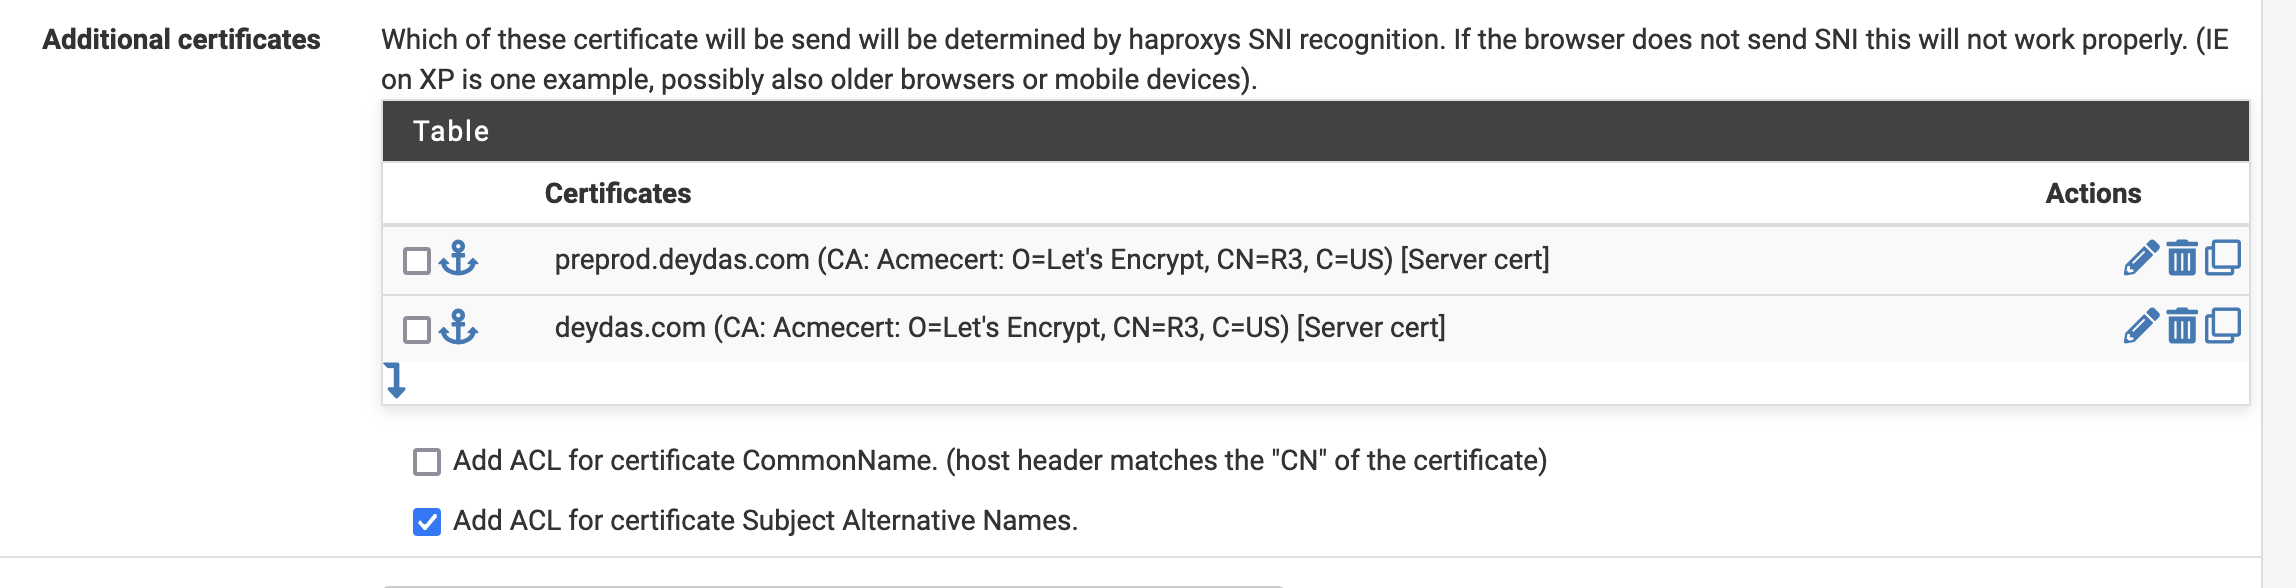
And the last thing we need to do is make sure the domain SSL certificates are available.
And that’s about it. After this is setup, you should be able to access your on-premise-hosted website from anywhere in the world. Happy hacking!
Leave a Reply