NextDNS is piHole on the cloud and claims to protect networks and devices from security threats, malware, and adverts. I have been using their DNS servers on our home network for a while now, and although that provides basic functionality, their NextDNS CLI provides more advanced features that I was missing out on. Unfortunately, there’s no official support on pfSense for it yet, and documentation is sketchy on how to get it up and running.
Hence, I thought of writing a 15-min step-by-step guide on setting up NextDNS CLI with pfSense.
The end goal
Before we get into the how, let’s talk about what we want to get out of this. On both physical and virtual interfaces, we want our devices to use the NextDNS DNS53 to DoH translator.
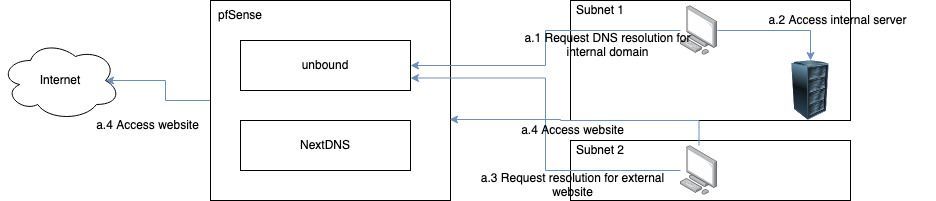
Our current path using the inbuilt unbound DNS resolver looks something like below for both external websites and internal domains. A client, in any subnet, calls out to unbound with a DNS query. Unbound resolves it recursively and responds with an answer, either to an internal server or to an external website. The client then connects to that server, assuming all other routing rules exist.
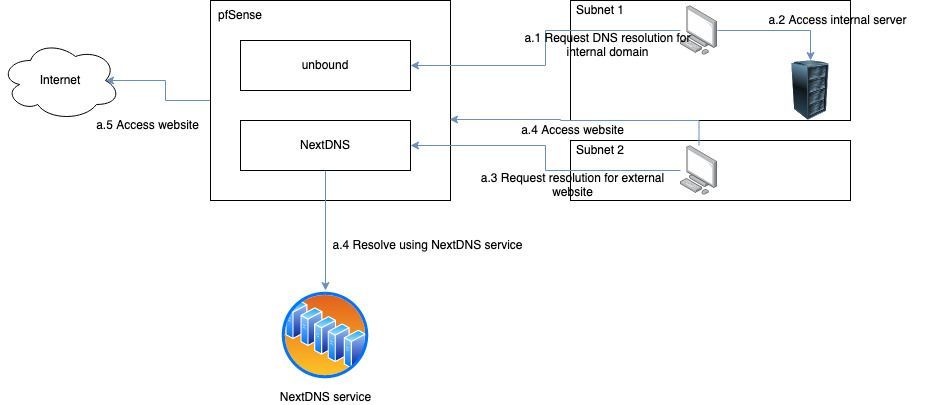
From that, we want to serve queries to external websites via the NextDNS DNS53 to DoH translator but keep serving queries to internal domains via unbound.
The 6-steps
Step 1: SSH into pfSense
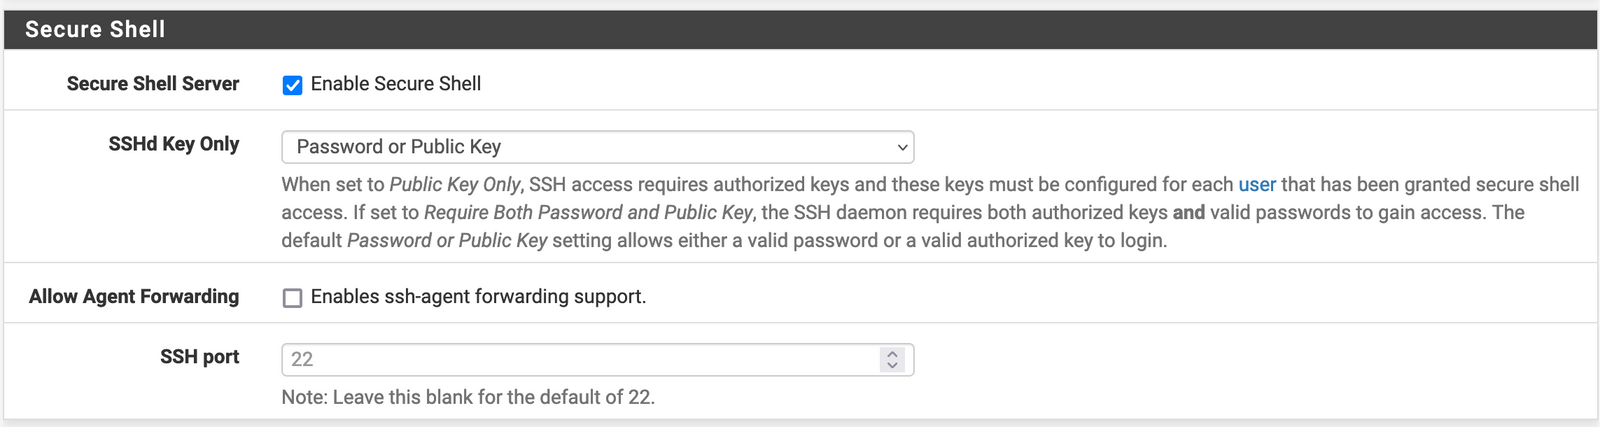
SSH access is turned off by default on pfSense. To enable it, go to System -> Advanced -> Enable Secure Shell
Step 2: Log into pfSense using SSH
Use any terminal to log into pfSense using SSH. Use the same username and password you use to login to the pfSense GUI.
Once you login select 8) Shell to access the shell prompt.
Step 3: Install NextDNS CLI
This wiki describes steps to install the NextDNS CLI. For our purposes, we just need one command.
sh -c 'sh -c "$(curl -sL https://nextdns.io/install)"'Follow the wizard and enter your config id from the NextDNS setup page.
Step 4: Modify the config
The installation script will create a vanilla configuration. We need to modify it to (1) make it play nice with pfSense and (2) support all our subnets. For more advanced usecases, like supporting conditional configuration (e.g. different configuration for a kids subnet), follow their guide here.
To edit the configuration file, in the pfSense GUI, navigate to Diagonistics -> Edit File and open the configuration file located at /usr/local/etc/nextdns.conf.
Let’s start with a template configuration.
control /var/run/nextdns.sock

discovery-dns 127.0.0.1:5555

bogus-priv true

use-hosts true

setup-router false

listen localhost:53

listen 192.168.1.1:53

listen 192.169.1.1:53

config xxxx

cache-max-age 0s

log-queries true

max-ttl 5s

report-client-info true

detect-captive-portals false

timeout 5s

cache-size 10MB

hardened-privacy false

auto-activate true forwarder internal.deydas.com=127.0.0.1:5555
There are a few things we need to modify to make it work:
- discovery-dns – unbound, by default, listens on port 53. In the next step, we will change it to something else (5555 in the template). Put in that port here.
- listen ip:53 – we need a listen entry for every subnet we want to route through NextDNS. In the template those are 192.168.1.1 and 192.169.1.1. We also need an entry for localhost so pfSense can resolve domains. Don’t worry about routing to internal domains just yet, we will get to that later.
- config – the config ID from the NextDNS setup page.
- forwarder – to forward internal domain resolution to unbound, we need to tell NextDNS to route all queries for domain.com (internal.deydas.com in this case) to unbound.
Feel free to keep the rest same, or modify if necessary.
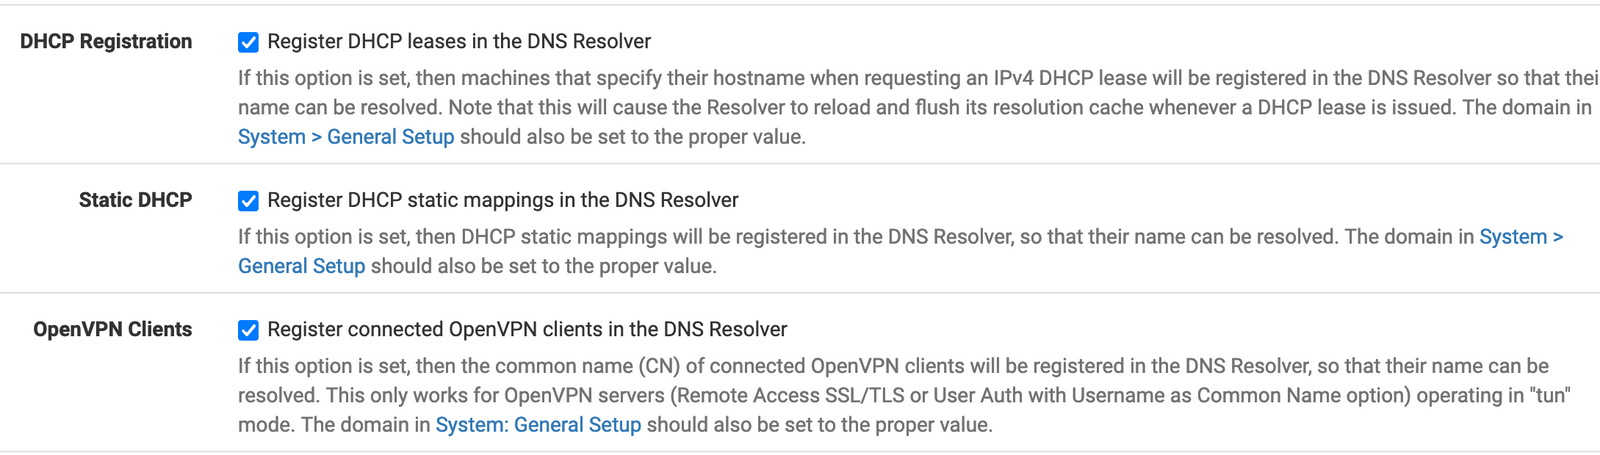
Step 5: Modify pfSense DNS Resolver settings
Go to Services -> DNS Resolver and change the following settings.

Step 6: Bringing it home
That’s about it. Restart unbound and make sure port 53 is released. Then restart NextDNS.
If everything goes well, you should see DNS queries for external websites routed through NextDNS. To verify, go back to the pfSense shell and run
21.05.1-RELEASE][[email protected]]/root: nextdns log
Feb 5 12:08:00 router nextdns[57391]: Query 193.168.6.131 UDP AAAA 3.north-america.pool.ntp.org. (qry=46/res=101) cached HTTP/2.0
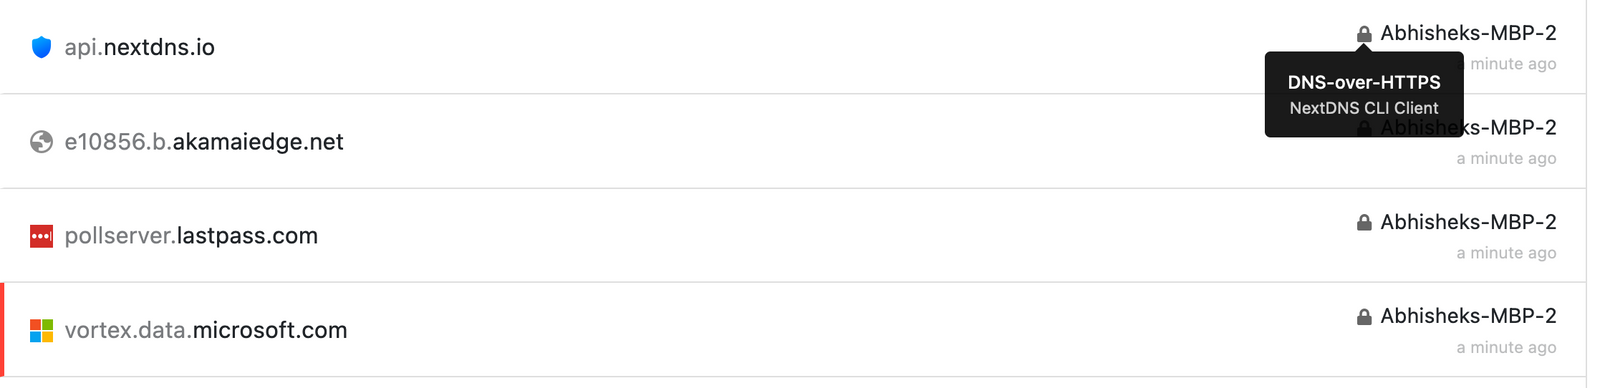
Feb 5 12:08:00 router nextdns[57391]: Query 193.168.6.131 UDP A 3.north-america.pool.ntp.org. (qry=46/res=110) cached HTTP/2.0The NextDNS logs page should also show queries along with the caller’s hostname.
Conclusion
I hope NextDNS comes up with a pfSense package that supports all these natively. But till then, this could be a simple workaround to support more advanced features like hostname logging, conditional configuration, local caching and split horizon.
Till next time, happy hacking!
Leave a Reply